Saturday, January 30, 2010
Underwater Photography
Friday, January 29, 2010
Fruit and Veggies are on a roll!
Thursday, January 21, 2010
St Croix Spinnaker Flying
We spent a lovely day anchored at Buck Island, to the northeast of St. Croix. Saw an awesome trimaran sail by that looked like a custom job of a Hobie 16 with a hull stuck in the middle.
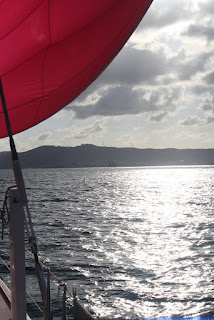
On the way back we put up our huge pink spinnaker!
This sail is AWESOME. We were beam reaching in 7 knots of apparent wind, averaging 7 knots of boat speed!
Gorgeous!
Under the pink sail emerged a big schooner with black sails.
I pulled out the telephoto lens for this shot:
At anchor near Gallows Bay we saw her coming in from her sunset cruise.
The sunset was beautiful!
Wednesday, January 20, 2010
Monday, January 18, 2010
Touch of Grey
Wednesday, January 13, 2010
Back to Sailing!
Yard work complete, new thru-hulls installed, and rig pre-tensioned, we splashed the boat and set sail for Norman Island.
Underway, sailing across the Sir Francis Drake channel, Tara and Craig "sail tune" the rig:
Sail tuning allows us to get even more tension on the rig because of the additional force created by the wind in the sail. The leeward (or downwind) shrouds are tightened a few turns, then we tack, and tighten the other side. We did this three times on each side.
The water was nice and warm, so we decided to stop for a snorkel.
And a refreshing beverage.
View from the Willy T with Diadem in the background:
Tara in the cave:
Craig and a squid:
Extra points if you can find the squid!!
Above is Elkhorn coral. This is a healthy specimen. Coral is a living animal -- technically it is a colony of individual polyps each of which is an animal, and as the animal grows outwards the skeleton it leaves behind forms the coral head. This particular species is considered an endangered and is protected. Below is another type of coral, a beautiful sponge coral.
Tuesday, January 12, 2010
Saturday, January 9, 2010
Haulout part 1
We hauled Diadem at Nanny Cay to replace the thru-hulls. Things went smoothly and backing the boat into the travel lift dock was easier than I thought it would be, with almost a foot to spare on either side!
The boat is lighter than I thought it would be.
We immediately got to work removing all the thru-hulls and seacocks. A thru-hull is a fitting that passes through the hull of the boat to allow fluids to flow into or out. A seacock is a valve attached to a thru-hull. Since these are all located below the waterline, if one should break the boat would immediately begin filling with water. Traditionally these fittings are made of brass, which is strong but can be subject to corrosion in the saltwater environment. Since they are all almost ten years old, it was good time to replace them. The new fittings are made of Marelon, which is a molded glass-reinforced plastic. These are easy to install, strong as metal, and will never corrode. We set up a mobile workbench on the back of Tim's truck to cut the new fittings to size.
Removing a thru-hull is easy if you have the right tools. An angle grinder quickly takes off the bit outside the boat and the decapitated fitting can be pushed thru the hole into the boat. Pretty soon we had a pile of gross useless brass fittings.
Most of the old fittings were in decent shape. You can see the nice yellow brass on the end that was cut off, which means that the thru-hull at that point is OK and not totally corroded even though it looked like it on the outside. But...
...this particular fitting snapped in half when we pushed it into the boat!! Just an inch and a half from where we cut it, the brass was so corroded that pieces of it could easily be broken off with my finger! Below is the same fitting as above, but looking at the part where it broke in half. Note how the brass is red and even green in places. If this fitting had snapped with the boat in the water, there would immediately have been over 100 gallons of sea water per minute filling the boat and no valve to turn it off! Scary thought.
Good thing we got that job taken care of! I am doing a bunch of other projects while the boat is out of the water, such as touching up the bottom paint, rebuilding and greasing the propellers, replacing the corroded keel coolers for the fridge and freezer (tomorrow's job and topic of another blog post), and also getting the carbon-fiber steering wheels professionally refinished. They are looking great!!
Wednesday, January 6, 2010
Love your Teak
This photo shows how much we had to take away to find the healthy parts of our hand rails. After all the sanding was through we were plesantly surprised with the amount of natural oils still in the wood. We were able to skip the next step which would usually be adding a layer of canned teak oil. After oiling it is recommended to wait 2 weeks before adding a sealer.
After sealing (not varnishing) the teak looks amazing- better than new! The sealant provides protection from UV rays and excessive moisture while allowing the wood to breath. Unlike oiling alone it does not promote the growth of mold and other degrading bacteria.
 This is the sealer we used-- Found at St. Thomas TuTu Home Deopt.


